Setup
Before Installation
- Refer to the list of contents to verify that the package contents are complete.
- Have the manual for your PC handy.
Installing the Drive
These instructions apply to most commonly used PCs.
CAUTION
- Avoid touching any exposed electronic conductors or contacts on the circuit boards of the drive or within the PC. These parts can be damaged by electrostatic discharges from your body.
- Before making connections, touch the metal chassis of your PC to discharge any static electricity from your body.
|
1
|
|
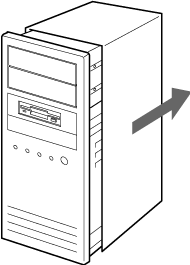
Turn the PC off and unplug the power cord from the outlet.
|
|
3
|
|
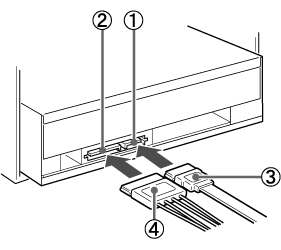
Connect the cables.
(Make sure the shape of the connectors match.)
|
CAUTION
- Using the wrong type of cable with this product can cause it to malfunction. Follow the instructions when connecting the product.
- Use only your computer's internal power supply.

|
Serial ATA connector
|

|
Serial ATA power connector
|

|
Serial ATA cable
|

|
Serial ATA power cable*
|
*
|
If there is no Serial ATA power cable in your computer, use a commercially available Serial ATA power adapter.
|
|
|
4
|
|
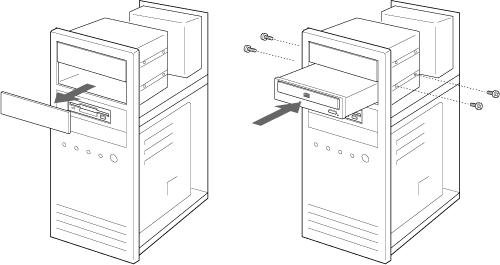
Install the drive in a 5-inch drive bay using screws.
|
|
5
|
|
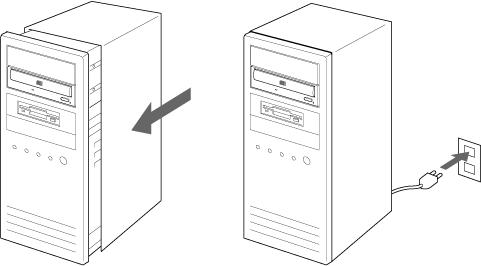
Replace the cover on the PC and connect the power cord.
|
|
6
|
|
Start the PC and confirm that the drive is detected.
|
|
7
|
|
Insert the accompanying software disc into the DVD/CD RW drive and install the writing software.
|